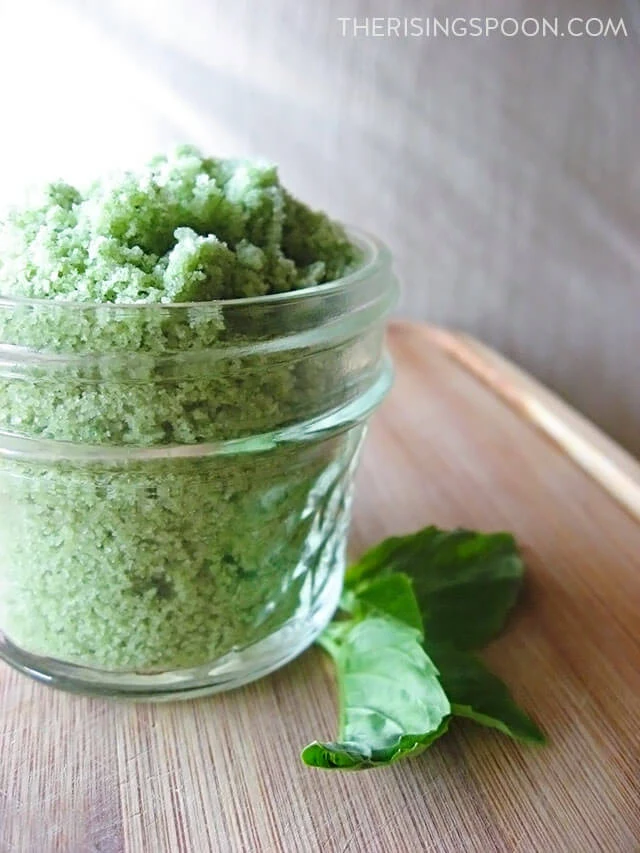
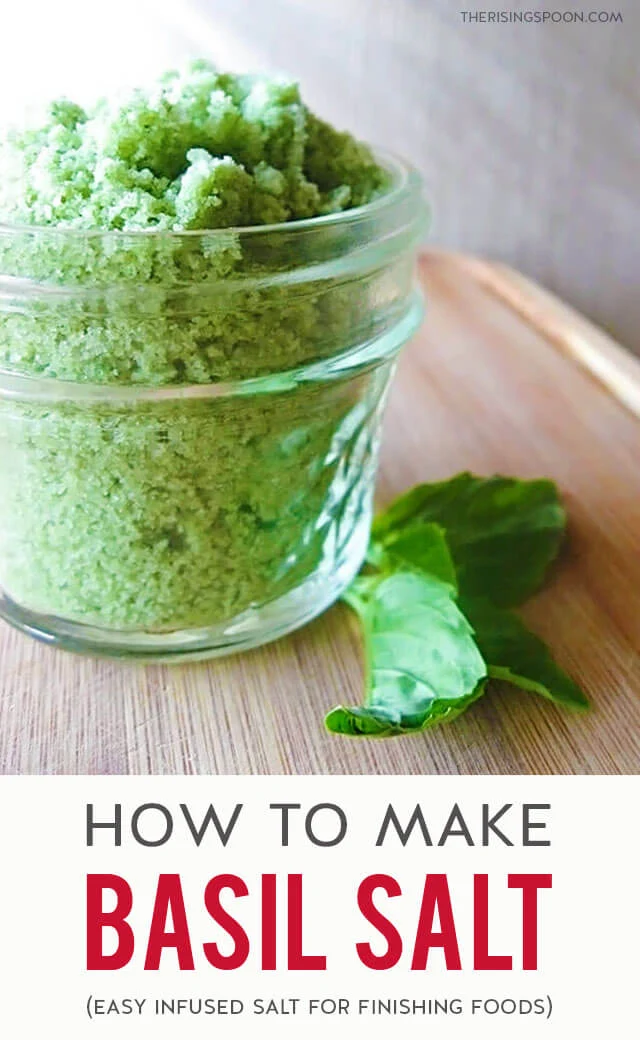
If you have an abundance of basil in your garden that you need to preserve before the cold weather hits OR you're looking for a quick & easy DIY food gift to make for a picky foodie friend in lieu of shelling out $$$ at Williams Sonoma or Sur la Table....then you're in the right place!
Infused salts sound fancy as heck (and you'd sure think so based on their price tag at specialty stores) but they're really a simple way to prevent food waste that is also budget-friendly, so long as you're buying ingredients that are in season.
(Ex: I wouldn't try to make 20 lbs of basil salt for your huge extended family in the dead of winter when fresh herbs are pricey. But, a small batch for your favorite people? Totally do-able. )
Benefits of Making Your Own Flavored Salts:
- No anti-caking agents like silicon dioxide added. Just your favorite salt and whatever flavor addition you want.
- WAY less expensive than buying it at the store. Some places charge an arm and a leg for only 1-2 ounces of gourmet sea salts with mix-ins like fresh herbs, spices, and fruit peels. Depending on where you live, making it at home will cost less than $2 for a CUP of gourmet sea salt and even less if you grow your own herbs or buy ingredients in bulk.
- They're excellent as gourmet finishing salts. In other words, you can sprinkle them on a dish right before eating (to finish it) for enhanced flavor.
- You can choose whatever salt you'd like as the base. There are lots to choose from, but some of my favorites are Celtic sea salt, Fleur de Sel, Alaskan sea salt, Maldon sea salt, and pink Himalayan.
How to Make Basil Salt
Flavored salts sound & look fancy (which can make them seem complicated) but they're totally not! To make basil infused salt all you need to do is:- Gather your fresh basil. Wash and dry it well, then chop it into pieces.
- Blitz the basil and salt in a blender (you can also use an immersion blender).
- Dry out the basil salt using one of the two methods listed in the recipe card below (oven or air-dry).
- Package it up in an air-tight container. Use it yourself in recipes or personal care products or portion it out into small glass jars or packets to give as homemade gifts to the foodies in your life.
Ideas For Using Basil Salt in Food Recipes
Sprinkle a bit of basil salt on these foods right before eating as a finishing salt:- heirloom tomatoes (sliced & raw or oven-roasted tomatoes)
- classic Caprese salad or hot Caprese cheese dip
- cubed watermelon or cantaloupe (if you're one of those folks who likes to salt their melons)
- buttered popcorn with parmesan cheese & cracked black pepper
- pan-seared, broiled, baked or grilled fish
- pizza that has tomatoes, mozzarella & pesto
- the obvious choice: pasta, pasta, pasta!
- creamy tomato basil soup
- homemade beef pho
- roasted potatoes, grilled summer squash, oven-roasted green beans, or sauteed asparagus
- grilled cheese sandwiches or BLT sandwiches (on the inside toppings)
- mix into unsalted butter when making an herb compote butter
- use it instead of regular salt when making homemade pesto
- put it on the rim of fresh fruit & herb cocktails (like strawberry lemonade + basil with vodka)
- put it into a tiny bowl & place on a charcuterie board for folks to sprinkle on various foods (like fresh veggies)
Ideas For Using Basil Salt in DIY Personal Care Recipes
Here are two ways you can use infused salts (I prefer sea salts here) for DIY personal care recipes:
1) Exfoliating Salt Scrubs
Mix the basil salt with olive oil, avocado oil, grapeseed oil, sweet almond oil, or softened coconut oil (I tend not to use this for scrubs since it can clog your tub in the cold months) to make a homemade scrub that you can use on your hands, feet, arms & legs for exfoliating (sloughing off) dead skin.
For tips on making exfoliating scrubs & the amount of carrier oil to use, check out my DIY chai vanilla sugar scrub post.
2) DIY Bath Salt Mixes
Dump a 1/2 cup of the basil salt into a hot bath along with plain Epsom salts, magnesium chloride flakes, and baking soda for a revitalizing & soothing bath as you soak in the water.
If you have basil essential oil, you could add a few drops, along with lavender essential oil, to either the basil-infused salt or Epsom salt before mixing it into the tub.
Note: If you want to pre-make bath salt mixes for gifts, portion everything into a big glass bowl (flavored salt, baking soda, Epsom salt), make sure it's mixed super well, and then scoop into glass jars with tight-fitting lids.
The ratios you use for bath salts are a personal preference, but I always make Epsom salt the main ingredient, followed by sea salt (in this case it'd be the infused basil salt), magnesium chloride flakes (optional - it adds a different type of magnesium), and baking soda in smaller portions.
More Homemade Food Gifts You'll Love:
- Rosemary, Orange & Thyme Flavored Herb Salt
- Stovetop Candied Pecans
- DIY Cold Brew Coffee
- Blueberry Infused Vodka
- Oven-Dried Spicy Beef Jerky
- Vanilla Infused Sugar
- Chocolate Dipped Shortbread Cookies
Yield: 1 cup

How to Make Basil Salt (Easy Herb Infused Finishing Salt)
prep time: 10 Mcook time: 30 Mtotal time: 40 M
Learn how to make a simple herb-infused salt with fresh basil leaves. This is a handy way to preserve basil from your garden once you've already made plenty of pesto for freezing. Use this herb-flavored salt to season & finish foods that naturally pair well with basil or mix it into DIY personal care products like salt scrubs & bath soaks! It also makes an excellent homemade gift for the foodies in your life.
ingredients:
instructions:
How to cook How to Make Basil Salt (Easy Herb Infused Finishing Salt)
Preparing the Basil Salt
- Measure out your fresh basil (both leaves & stems - the latter has plenty of flavor and it all gets blitzed anyway), then chop into small pieces so it's easier for the blender to incorporate it with the salt. Place the basil in the blender, or if you're using an immersion blender, into a large mixing bowl.
- Add the coarse salt and pulse for a minute or two until the basil is completely broken up (in tiny pieces) and mixed with the sea salt. You may need to stop and mix the salt with a rubber spatula during this process. It has a tendency to get stuck at the bottom of the blender. When you're finished the sea salt will be a fine texture (which is why I started with coarse salt or big flaky salt) and that's what we want.
Drying The Basil Salt
- Oven-Dried Method (Faster But Slightly Heats Up Kitchen): Spread the basil salt mixture evenly onto a large rimmed baking sheet. Set the oven to 220 degrees and pop the sheet inside. Bake 30 minutes or until the salt is no longer wet, stirring once halfway through. Once dry, the basil salt should still be green, but a lighter shade than when you first started. Break apart any clumps with a wooden spoon or fork and store the finished salt in an airtight container (I prefer glass jars) in your pantry. For best flavor, consume within 3 months.
- Air-Dried Method (Slower But No Heat Needed): Line a large surface such as a baking sheet or cutting board with parchment paper. Spread the basil salt mixture out in a thin, single layer on the parchment paper. Break up any large clumps with your fingers and cover completely with a clean kitchen towel. Place in a cool, dark area where it won't be disturbed. Let the sea salt sit for 12-24 hours, or until the salt has absorbed all the moisture from the basil and is completely dry. The basil sea salt should still be green, but a lighter shade than when you first started. Transfer it to a container with a tight lid (like a mason jar) and use within three months for best flavor.
NOTES:
#1 - COLOR: When you first blend the basil sea salt, it will be a vivid green color. However, after drying the color will be a lighter green. It's still colorful, just not as noticeable. If you want it to have a brighter green color experiment with adding more basil (or follow the steps below in note #2) but make sure there is enough salt to dry it out.
#2 - FLAVOR: As some of the commenters have pointed out, once the salt dries the basil flavor is much less pronounced. If you want a stronger flavor for a specific recipe, whip up a fresh batch, skip the drying, and stick it straight into the fridge until you're ready to use it. Ideally, you'd use it the same day you make it and then pull out any leftovers within 1-2 days and dry the rest.
# 3 - CLUMPING: Unlike store-bought infused salts, this homemade version doesn't contain any anti-caking additives, so it will naturally clump over time. Simply give the salt a firm shake or rub the clumps between your fingers to break it up.
© The Rising Spoon. All images & content are copyright protected. Please do not reprint this recipe without my written permission. If you'd like to feature this recipe on your site, please take your own pictures, rewrite the directions in your own words, and link to this post as the original source. Thank you!
UPDATE (8/18/2019): This post was originally published in December 2013 but has been heavily updated with tips, bigger pics, and a printable recipe card.
Did You Make This Recipe?
I'd love to hear your thoughts on how it went! Please leave a comment here on the blog, on Pinterest via the "tried it" feature, or use the hashtag #therisingspoon & tag @therisingspoon when you share pics to Instagram, Facebook, or Twitter. It helps me to get feedback on my creations and it totally makes my day. :)Click Here to Save This To Your Homemade Recipes Board On Pinterest!
PAID ENDORSEMENT DISCLOSURE: In order for me to support my blogging activities, I may receive monetary compensation or other types of remuneration for my endorsement, recommendation, testimonial and/or link to any products or services from this blog. However, I ONLY recommend helpful products that I myself would use.
MEDICAL DISCLOSURE: The information included on this website is intended for educational purposes only. It is not intended nor implied to be a substitute for professional medical advice. None of the opinions expressed here are meant to diagnose or treat any disease or illness. You should always consult your healthcare provider to determine the appropriateness of the information for your own situation or if you have any questions regarding a medical condition or treatment plan.


No comments
Post a Comment