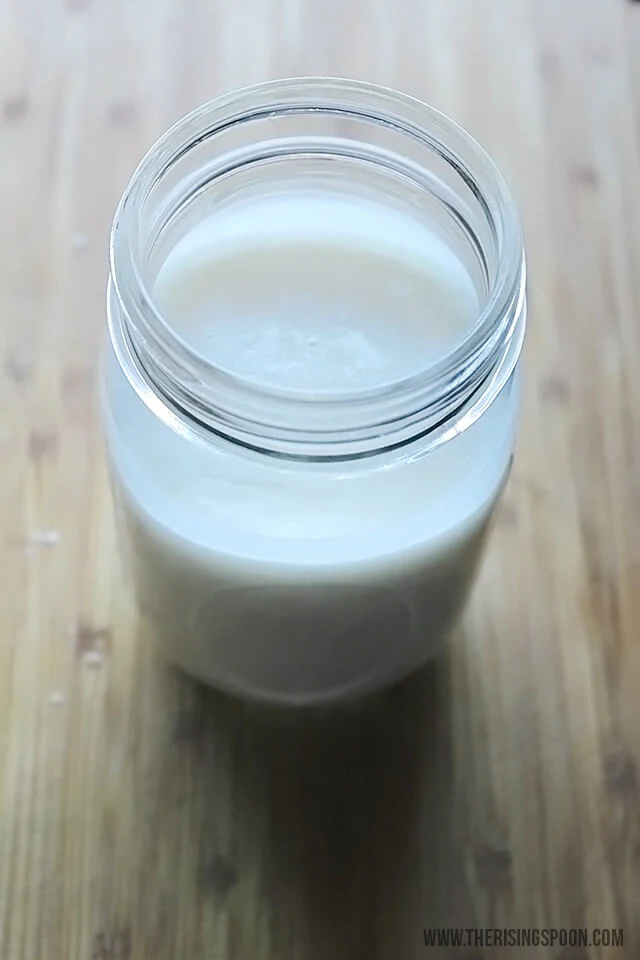
Learn how to make coconut butter at home in about 10-15 minutes with a bag of dried coconut flakes and an immersion blender + regular blender. This recipe is so cheap & easy! Use coconut butter (also called coconut manna) in place of peanut or almond butter in your favorite snacks and desserts for extra fiber and healthy fats that will satiate sugar cravings & help to keep you full longer.
Ever since I figured out how to make coconut milk and coconut flour at home, I've been jonesing to make coconut butter. I'd walk past the nut butter section in my local health food store, stare forlornly at the coconut butter, take one look at the $16 a jar price tag, and keep on moving.
Do You Need a Food Processor To Make Coconut Butter?
I put off making a DIY version of coconut butter for way too long because I assumed I needed a food processor or high-speed blender to pull it off.
BIG FAT NOPE.
As it turns out, I already had two inexpensive kitchen tools on hand for the job: my immersion stick blender and regular blender.
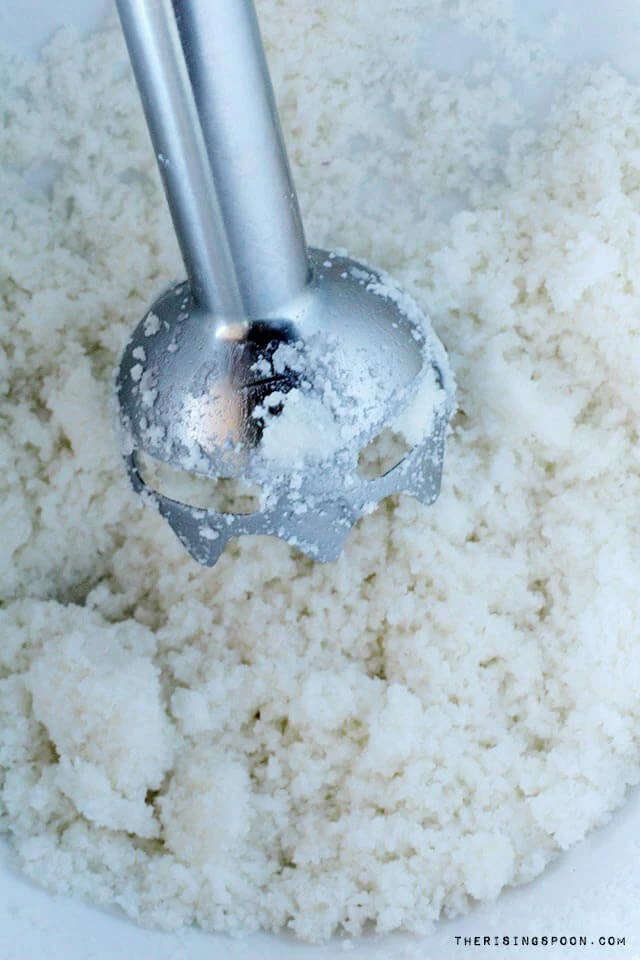
So I grabbed an inexpensive bag of dried unsweetened coconut flakes (yes, this is a one-ingredient recipe) and used my immersion blender set on low speed to break down the finely shredded coconut flakes past the coconut flour stage and into a more buttery state.
Once it was soft enough that I felt confident my blender would be able to whiz it without getting stuck (I've read this can happen even in high-speed blenders), I transferred it to the big one, and let it run for a few minutes until it was as smooth and liquidy as I could manage.
Bam--homemade coconut butter!
The Difference Between Coconut Butter & Coconut Oil
The main difference (besides consistency) between coconut oil and coconut butter is that the butter contains the meat of the coconut, and thus all the fiber while coconut oil has that filtered out. So, with coconut butter, you get all the health benefits of coconut oil (MCT oils & lauric acid) but it's more filling thanks to the coconut meat.
It's great for bulking up snacks and sweets like homemade fudge or energy bars/balls, but there are honestly so many ways you can use it. Think of all the possibilities for peanut butter and then you'll have some ideas.
I loooove using coconut oil in coconut rice and homemade chocolate sauce, for topping popcorn and mashed sweet potatoes, and in DIY recipes like homemade lip balm and whipped body butter, but for snacking purposes coconut butter is awesome to have around.
Now that I have a full jar sitting on my counter, I plan on eating it liberally with a spoon (ahem!) and then tinkering with some coconut snack recipes. Keep an eye out for them soon.
Tools I Used To Make Coconut Butter
- immersion stick blender: This helps to break down the coconut flakes before it goes into the regular blender so it doesn't get stuck in the blades. I use mine every day for bulletproof coffee (the cleanup is quick & easy) and other times for pureed soups and blended salad dressings.
- regular blender: This helps to further break down the coconut butter, as an immersion blender will only go so far. The good news is you don't need a fancy high-speed blender or food processor (although you can use them if you do).
- large bowl: For the immersion blender part of the recipe so it doesn't splatter everywhere.
- silicone or rubber spatula: Handy for scraping the coconut bits out of the immersion blender blades and regular blender as you process it into butter.
Yield: approximately 1 1/2 cups

How to Make Coconut Butter
prep time: 15 MINScook time: total time: 15 mins
Learn how to make coconut butter at home in about 10-15 minutes with a bag of dried coconut flakes and an immersion blender + regular blender. This recipe is so cheap & easy! Use coconut butter (also called coconut manna) in place of peanut or almond butter in your favorite snacks and desserts for extra fiber and healthy fats that will satiate sugar cravings & help to keep you full longer.
INGREDIENTS:
- 4 cups of unsweetened, finely shredded dried coconut flakes (like THIS)
INSTRUCTIONS:
- Measure the shredded coconut into a large bowl or a container deep enough so that you can easily blend the flakes without it splattering coconut everywhere. Use your immersion stick blender on low to pulse the coconut flakes until it turns into a finer texture, closer to flour (it will still be grainy), taking care to move the stick blender around the bowl to get all the flakes equally. The coconut flakes will probably get stuck in the blades, so you'll need to scrape out the coconut every minute or so with a spoon or small spatula.
- Once you get to the flour stage, you're only 1/3 of the way there. Keep pulsing the coconut flakes, scraping the blades when needed, until the coconut flakes begin to soften and turn slightly liquidy (the coconut oil coming out). This should take at least 10 minutes. Be patient and keep trucking!
- Once it's soft enough and looking more liquidy (it's about 2/3 done at this point), transfer to a regular blender and whizz away for a few minutes until it's liquidy (like peanut butter, but grainier). The longer you blend the coconut butter, the smoother it will be, but you can only get it so smooth in a regular blender. That is the benefit of using a high-speed blender or food processor, but it's not a big deal using an immersion blender and regular blender. It will still taste amazing!
- When the coconut butter is as smooth as you desire, pour it into a separate container (I prefer a mason jar), secure with a tight-fitting lid, and store on the counter.
© The Rising Spoon. All images & content are copyright protected. Please do not reprint this recipe without my written permission. If you'd like to feature this recipe on your site, please take your own pictures, rewrite the directions in your own words, and link to this post as the original source. Thank you!
Created using The Recipes Generator
Notes & Tips
- If the coconut flakes aren't blending well in your regular blender, melt 1-2 tablespoons of coconut oil on the stove top, and add that to the mixture to help get it moving.
- Alternately, you can pour it back into the bowl and use the immersion blender again to get it to a softer stage.
- To get the best results for your time and effort, I recommend making a batch of coconut butter with no less than 3 cups of shredded coconut.
Did you make this recipe? I'd love to see! Follow The Rising Spoon on Instagram, upload a pic, mention @therisingspoon and tag #therisingspoon so I can check out your creation!
Don't miss a post! Want updates on my real food recipes, kitchen tutorials, DIY crafts, and healthy living articles on a weekly basis? Sign up using the box below.
P.S. Keep Reading! More Recipes From The Rising Spoon:
PAID ENDORSEMENT DISCLOSURE: In order for me to support my blogging activities, I may receive monetary compensation or other types of remuneration for my endorsement, recommendation, testimonial and/or link to any products or services from this blog. However, I ONLY recommend helpful products that I myself would use. And I'm really picky about what I share with you guys. Recommending products that I love or want to own helps me cover the costs of running this blog and keep providing you with free, helpful information. And it costs nothing extra for you. Thanks!
MEDICAL DISCLOSURE: The information included on this website is intended for educational purposes only. It is not intended nor implied to be a substitute for professional medical advice. None of the opinions expressed here are meant to diagnose or treat any disease or illness. You should always consult your healthcare provider to determine the appropriateness of the information for your own situation or if you have any questions regarding a medical condition or treatment plan.


No comments
Post a Comment